From the desire to beautifully hang frames with photos, paintings or posters on the wall to the implementation of this plan, you only need one thing - to come up with a layout of the images. But why reinvent the wheel when you can use ready-made ideas.
Frames on the wall are one of the favorite solutions of many designers. Create a gallery of family photos and the atmosphere in your home will become warmer and more comfortable. Choose pictures that are united by color scheme or theme, and you will bring style and mood to the interior. Don’t forget that frames are also a win-win way to decorate boring bare walls that can be found in almost every apartment.
Not all of us have a design degree to come up with a good layout for memorable cards, posters or paintings on the spot. And why complicate everything if ready-made solutions can be found in our article!
How to beautifully hang certificates on the wall?
Photos help us store important memories of events that happened earlier: family vacations, weddings, celebrations, meetings with friends. Previously, they were invested in albums, now they are mainly found on electronic media.
But why hide them - photos can be hung on the wall - this is an easy and economical wall decor!
But how nice it would be to see the most important photos not once a year, for example, but every day! They can be colored or black and white, glossy or matte, perhaps even with an antique effect, but they are all so familiar and pleasing to the eye and heart.
In this article we will look in detail at diagrams and methods of hanging photographs on the wall, as well as how to do it correctly.
Photo hanging schemes
Let us analyze in detail all the schemes and methods for arranging photos on the wall.
Along a horizontal line
These can be photographs of the same size, or gradually increase from small ones (or vice versa). Draw a line and align the bottom edge of each photo along it.
Along an inclined line
Similar to the previous method, only here you draw an inclined line and the corner of each photo should approximately touch it.
TIP: Take photos of the same size, or large at the bottom, and make them smaller towards the top.
Rectangle or square
- The simplest version of this method is to select all the photos of the same size and place them at the same distance from each other, then the rectangle will turn out on its own.
- But you can also outline the outline of a rectangle or square and select photographs so that the edges of the side, top and bottom photos clearly coincide with the lines.
This way, it’s like putting together a puzzle of photographs of different sizes.
Symmetrical along an arc
This method will look good if the arc passes, for example, around a mirror or a clock. Or it can be obtained by attaching a photo to a thread (read further in attachment methods).
Chaotic
ATTENTION: Even when hanging photos chaotically, keep in mind that they should look harmonious together. Think about what photos should be nearby.
Forming a drawing
For example, we put together a heart, a flower, a cloud from photographs
Methods for posting photos
Let's look at all the ways you can mount photos on the wall.
Hang in frames on the wall
This is a classic decoration option, and the frames can be wooden, metal or colored plastic.
Also, each of them can be separately decorated with such a variety of decorative elements as beads, buttons, colored paper, fabric, ribbons, stones, rhinestones - whatever comes to mind, the main thing is that the decoration matches and matches the style of the photo.
Arrange in frames on shelves
Everything that concerns the frames from the previous point remains, only here we will not hang them on the walls, but place them on shelves, racks, bedside tables and tables.
Large photo frame
If you have a large and beautiful frame from a mirror or picture, you can stretch strings inside and place a photo. Also, such a frame made of baguette can be ordered in any workshop.
Attach to the wall with double-sided tape
A simple method, and less expensive in terms of money than the previous ones, because you don’t have to spend money on a frame, just print out the photo and hang it up . And it will be faster in time, no holes need to be drilled.
Hang threads on the wall and attach photos to them with clothespins
You nailed two nails at different ends of the wall , pulled a string between them, and hung the photographs, securing them with clothespins.
- As soon as the photos start to get boring, quickly change them to others; here this will not be any problem: you don’t need to rearrange the frames, or peel the photos off the wall, thereby damaging the wallpaper.
- You can hang several ropes at different levels, thus decorating the entire wall.
TIP: The rope can be pulled tighter or looser by controlling the slack and placing the photo either in a straight line or in an arc.
.
Hang on wooden sticks
- In the photo, make a hole in the upper corners and thread a thread through them, then take a thin wooden stick approximately the same size as the width of the photo.
- And we tie these strings to the edges.
- Now we take another thread, tie it along the edges of our homemade stick frame and hang our entire structure on a nail using this thread.
Where to hang
The best place to hang a photo is in places that attract the most attention: for example, around the TV, above the sofa, above the bed. Also, photos can fill and beautifully decorate any empty wall.
On the whole wall
If you have an entire empty wall, then photographs will fill that space in the best way possible. Select photos, a diagram and a hanging method and go ahead!
Above the sofa
Most often, there is empty space above the sofa, table or bedside table: the shelf will most likely get in the way, leaving the choice between a painting or photographs.
- If you stopped at the photographs, then further actions are similar to the previous point, only there will be a little less space.
- Although, even on an empty wall, most often they hang it not from the floor, but just at least a meter from the floor, so everything is the same.
Around the TV
Usually the wall on which the TV hangs is empty. But you can beautifully design her photo.
In the bedroom and above the desk
Photos above your desk or at the head of your bed will save you from the problem of buying any decorations.
Around mirrors, paintings, windows
The mirror will serve as the center of your exhibition and form a photo collage around itself. The mirror does not have to be the same shape as the frame. A round mirror and square frames are considered excellent.
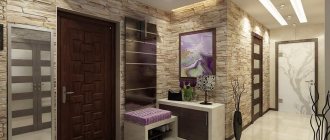
On a blank wall in the corridor
In 3- or 2-room apartments with an old layout, there is often a blank wall at the end of a narrow corridor. Usually it is completely non-functional. But if you hang a photo on it and light it up, it will become much more cozy!
In an empty corner
The corners of the walls are most often empty, since protruding objects are easy to catch when moving. But the photographs are flat and a collage of them can decorate this part of the apartment in an original way.
- Along the steps or on the wall under the steps (if a private house or two-story apartment)
- You climb the steps slowly, look at the photographs and do not feel any fatigue. Alternatively, you can hang photographs from bottom to top as the children grow older.
How to hang it correctly
In order not to be disappointed in the result after attaching the photos, you need to initially plan how they will hang, and only then hang them. Let us roughly divide the planning process into three stages:
STEP #1: Mark
- First, make a sketch of the hanging diagram on a piece of paper, then make corresponding notes on the wall.
- Please note that the center of attention will be at eye level, on average 160 cm ,
- do not go right to the end of the wall, leave 20 centimeters .
STEP #2: Make a template
- Cut out the dimensions of the frames from newspapers or leaves and attach them to the wall according to the chosen pattern.
- See how it will actually look, make adjustments if you don’t like something.
STEP #3: Mount to the wall
Now, in place of each paper sketch, you can safely attach the selected photos and enjoy the result. Depending on the hanging method, you may have to drive in nails, in which case stock up on the necessary tools.
Tags: photo frames
Comments 71
I know another way to attach photos - these are stickers fotovic.ru/stikery-dlya-nakleivaniya-fotografij/. In the future, take this method of fastening into your arsenal. There would be no need to drill the walls - that's 100%. I see that there are a lot of advisers here!
So the holes were already there. Most of them closed their cable channels.
We would like your problems...
Well, Idk, it’s somehow very difficult...
The first thing was to spit in the eye of the one who had hanged him before))
I perfectly glue the cable channel with hot glue))
fuck, first there was basic internet literacy, now people are crooked in their work, they can’t hang pictures straight without a cable channel... soon they’ll start shitting in the toilet using the instruments
Go hang it. Then you can show us. So name the topic: how to hang exactly a lot of pictures without a cable channel